
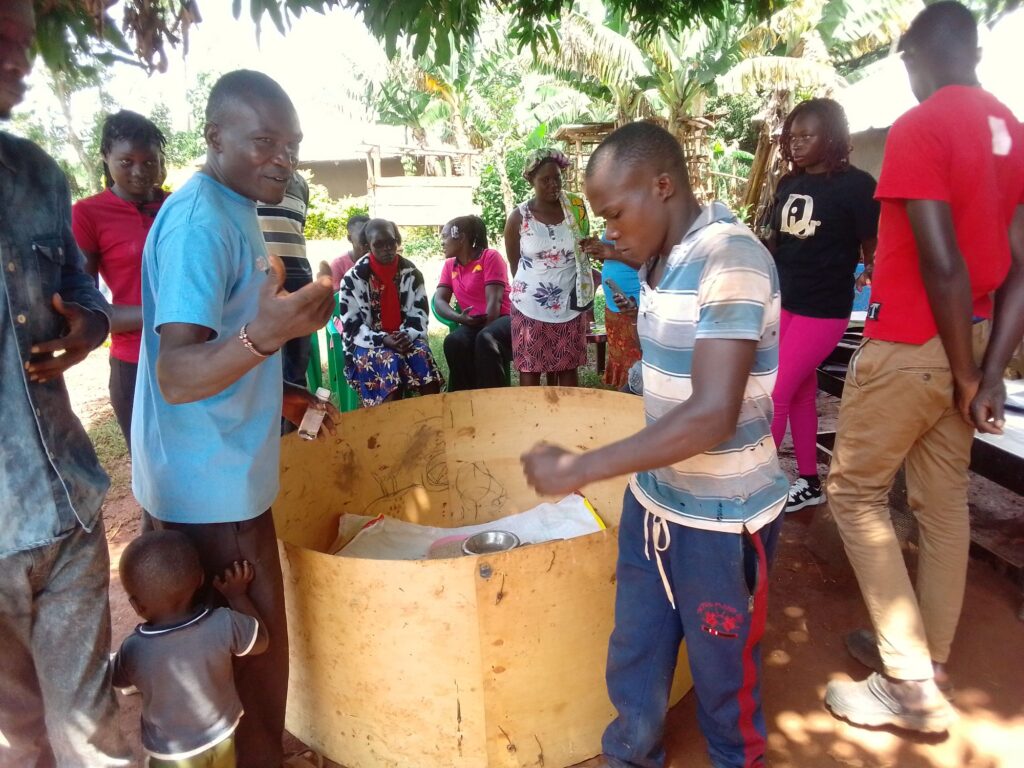
Sometime last month I joined my colleagues in a certain youth empowerment group I have been attending for months now where we indulge in topics such as entrepreneurship, agribusiness, ways of empowering the young people, especially women in our community. Climate change, youth unemployment, conflict management, digital skills, green business entrepreneurship among other topics that we discuss and practice. And of course there’s some incentive at the end of the day from sponsors to encourage youths to attend.
So in the last meeting we learned how to build a multi-storey garden to maximize on space, especially for city dwellers and even for kitchen gardens, we learned how to make quality organic fertilizers, and last but not least, how to build a simple chick brooder. The latter is our topic of the day, the rest we shall tackle some other time.
Many young Kenyans are getting into poultry farming: keeping chicken for their various products such as eggs and meat; some are going for ducks for their various advantages such as disease resistance; some are targeting quails, and a some, like one of our members is keeping ornamental birds. And for all these to succeed, one needs to have a proper chick management system in place, otherwise you end up getting losses.
Also Read: Kienyeji Chicken Farming in Rural Kenya
Chick brooding is the process of providing young chicks with optimal environmental conditions, especially warmth, during the early stages of their life (typically the first 4–6 weeks). There are three main types of brooding systems, based on heat source and management approach:
There are three ways of brooding chicks:
- Natural brooding
- Artificial brooding
- Combined brooding
1. Natural Brooding
This is where brooding is done by a broody hen or mother hen who provides warmth, protection, and teaches the chicks how to find food and water. Used in small-scale or backyard poultry systems.
Advantages:
1. No external heat source needed.
2. Low cost.
Disadvantages:
1. Limited to small number of chicks.
2. Can’t be scaled for commercial use.
3. Risk of disease transmission from hen to chicks.
2. Artificial Brooding
In this type of brooding, heat and care are provided by artificial means such as brooders, without a mother hen. Commonly practiced in commercial poultry farming. There four types of this type of brooding.
Types of Artificial Brooding:
i. Coal/Charcoal Brooders – Use coal or charcoal burners under canopies.
Advantage: inexpensive.
Disadvantage: fire hazard, smoke issues, hard to regulate temperature.
ii. Gas Brooders – Use propane or natural gas burners.
Advantage: efficient and effective in large setups.
Disadvantage: risk of gas leaks, needs good ventilation.
iii. Electrical Brooders – Use infrared bulbs, heating plates, or electrical coils.
Advantage: clean, easy to control, and safe.
Disadvantage: higher electricity costs, power outage risks.
iv. Infrared Brooders – Use infrared lamps that radiate heat directly to chicks.
Advantage: energy-efficient, focused heating.
Disadvantage: limited coverage area.
3. Combined Brooding
This type is also referred to as semi-automatic and involves combining both the natural and artificial methods e.g., artificial heat plus some manual care. Used in medium-scale or transitional farms.
Advantages: flexibility in management.
Disadvantages: requires close monitoring
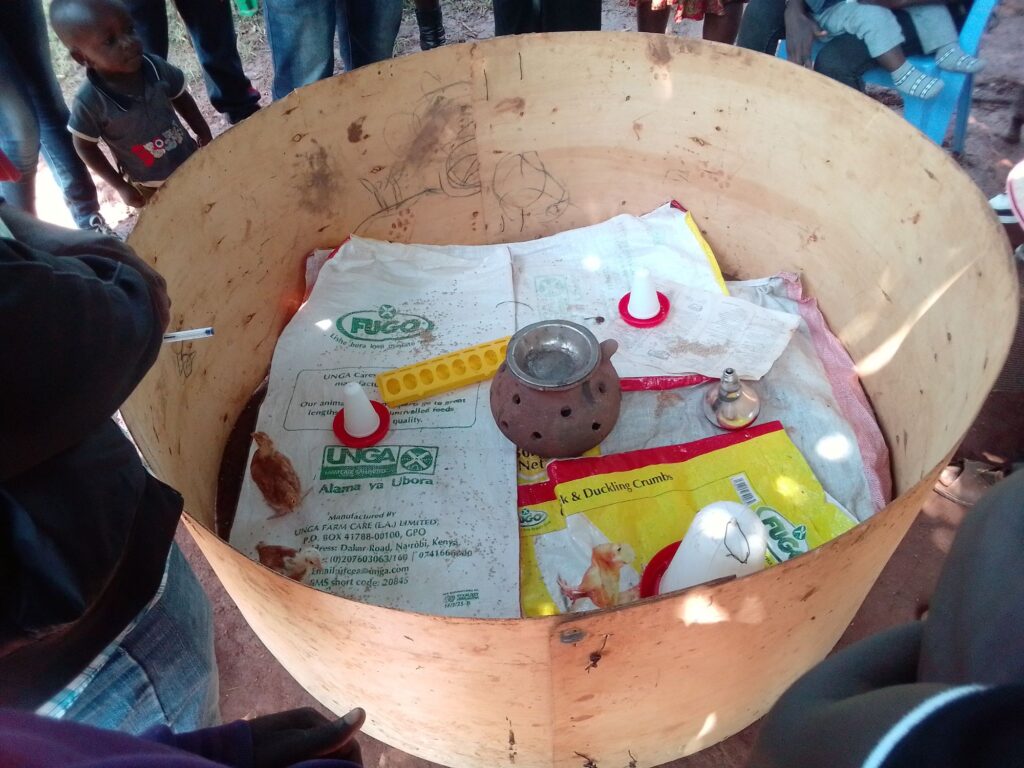
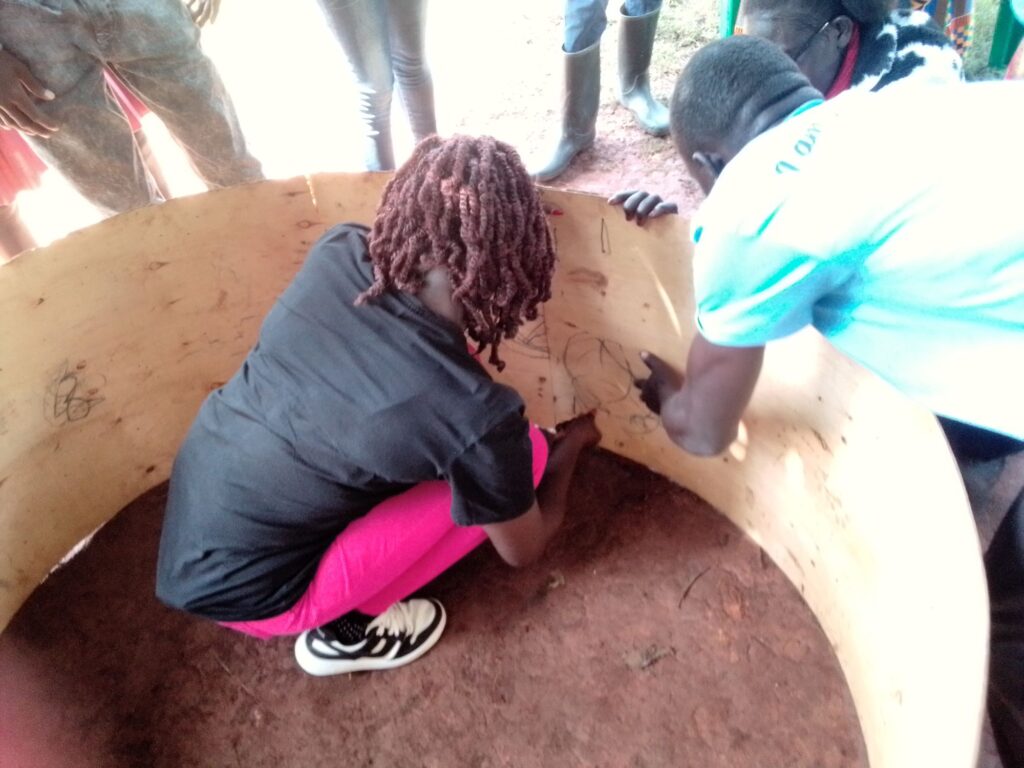
Building a brooder
Materials needed
1. Heat lamp with clamp or brooder pot
2. Thermometer (digital or analog)
3. Bedding wood shavings or paper towels
3. Chick feeder and waterer
4. Chicken wire or mesh cover (optional but useful)
5. Small fan for ventilation on low setting (optional)
6. Plywood
Steps to building a brooder
1. Build a brooder
Using plywood, build a mobile brooder by joining them to a form circular unit, a minimum of 2 feet in height. Place it in a safe room, it can be within a chicken house or separate. But if you choose a particular room or house for the brooding purpose, get rid of the corners if any to avoid chicks crowding which usually ends up in fatalities.
Size depends on the number of chicks; 6-12 chicks will need at least 3–4 square feet.
2. Prepare the Base
Line the bottom with 2–3 inches of wood shavings, preferably from pine not cedar which is toxic to chicks. Or you can use paper towels for the first few days which is easier for traction and cleanup but also to prevent chicks from eating wood shavings since at that stage they can barely differentiate.
3. Set Up the Heat Source
Mount a heat lamp on one end of the brooder (securely clamped to avoid accidents), or use a brooder pot set amidst the brooder and placed on a tripod to prevent burning the wood shavings.
Keep the temperature 35°C or 95°F for the first week. Reduce the temperature by 2°C each week until room temp is about 25°C about 5–6 weeks.
Place a thermometer at chick level to monitor.
4. Add Food and Water
Use chick-sized feeders and waterers to prevent drowning or contamination. Raise them slightly on bricks or blocks to keep bedding out. Always keep clean, fresh water available. Add 3-5 drops of liquid paraffin in water.
5. Ventilation & Cover (Optional)
If pets or drafts are a concern, use chicken wire or mesh as a lid. For better airflow, ensure the container is not sealed too tight. You can cut air holes if needed (just not in cardboard).
6. Monitor and Adjust
Watch the chicks’ behavior: Huddled under the lamp = too cold
Avoiding the heat source = too hot
Spread evenly = alright
Brooder Checklist:
✅ Safe, draft-free container
✅ Proper heat source & thermometer
✅ Clean bedding (changed regularly)
✅ Chick starter feed
✅ Clean water daily
✅ Enough space as they grow
Large plastic tote/bin, wooden box, or cardboard box (minimum 12″ high)

Disclosure: This banner contains an affiliate link. I may earn a commission if you purchase through it, at no extra cost to you.